If you are looking for a detailed and easy-to-follow guide to set up Zoho Mail’s free plan, this article is for you.
1. Struggling with Zoho Mail Setup? You’re Not Alone!
I recently created a Zoho Mail account and Zoho Business Email. Zoho provides an official guide for new users, which I followed step by step. While it seemed straightforward at first, I found some parts challenging. Due to my limited knowledge, it was difficult to determine whether I was completing the steps correctly. I use a hosting service called Chemicloud, which also provides a Zoho Mail setup guide. Despite referring to both guides, I found the process more challenging and time-consuming than expected.
This article is written for those who, like me, have encountered difficulties while setting up Zoho Mail and have searched for solutions. I have put together this guide with a beginner’s perspective to make the process as clear and helpful as possible. This guide is particularly useful if:
- You own a domain.
- You want to create a business email for your website.
- You are managing your website independently.
- You plan to sign up for Zoho Mail’s free plan.
- You’ve found Zoho’s official setup guide but are struggling to complete the process and need an alternative.
2. A 14-Step Setup Guide
Step 01: Create Zoho Account
Go to the Zoho Mail website. The first step is to create a Zoho account. Select the Business Email option and proceed with the sign-up process. You can create an account by entering your name, email/phone number, and password, or you can sign up using your existing Google, Facebook, LinkedIn, or X accounts. Even if you choose to connect an external account, you can disconnect it later if needed, so pick the option that is most convenient for you.
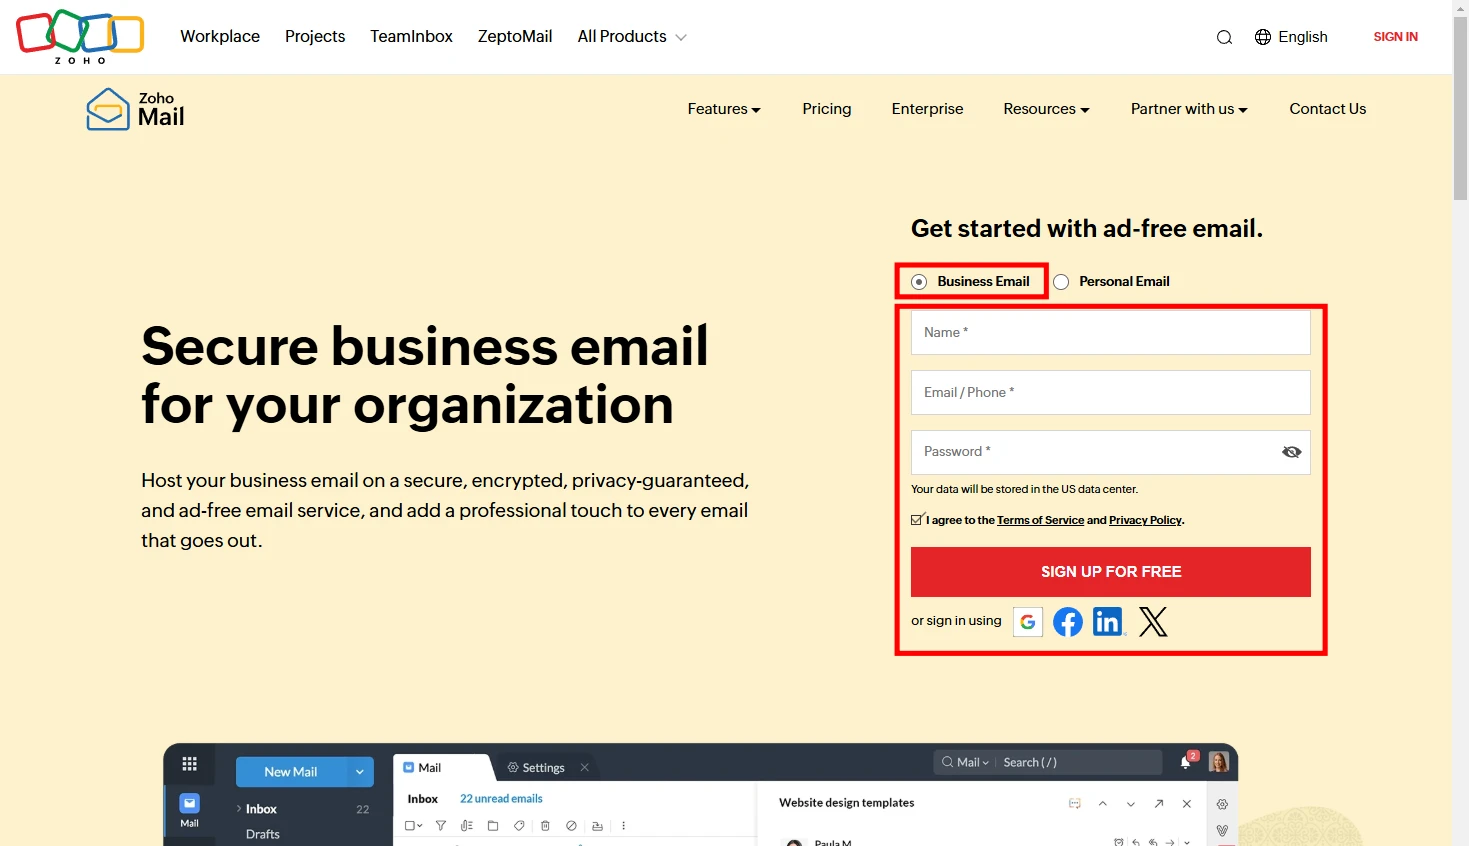
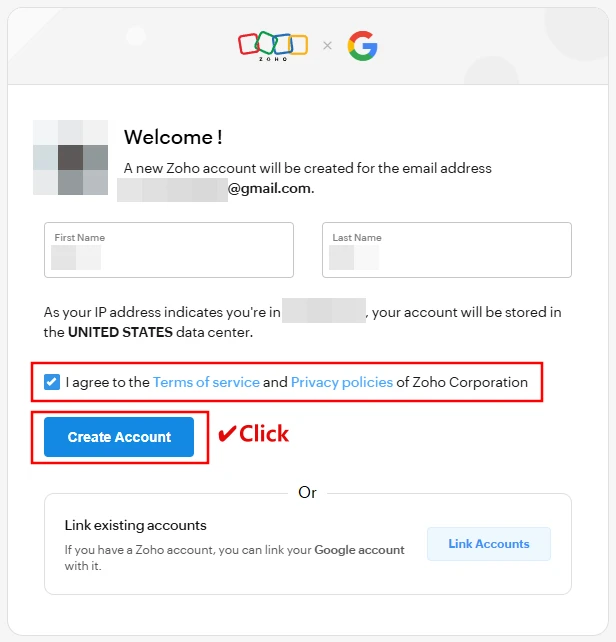
I decided to create my Zoho account using my Google Account. If you are not residing in the United States, you may encounter a notice stating that your data will be stored in the U.S. Simply check the agreement box and click the Create Account button to proceed.
Step 02: Choose a Plan
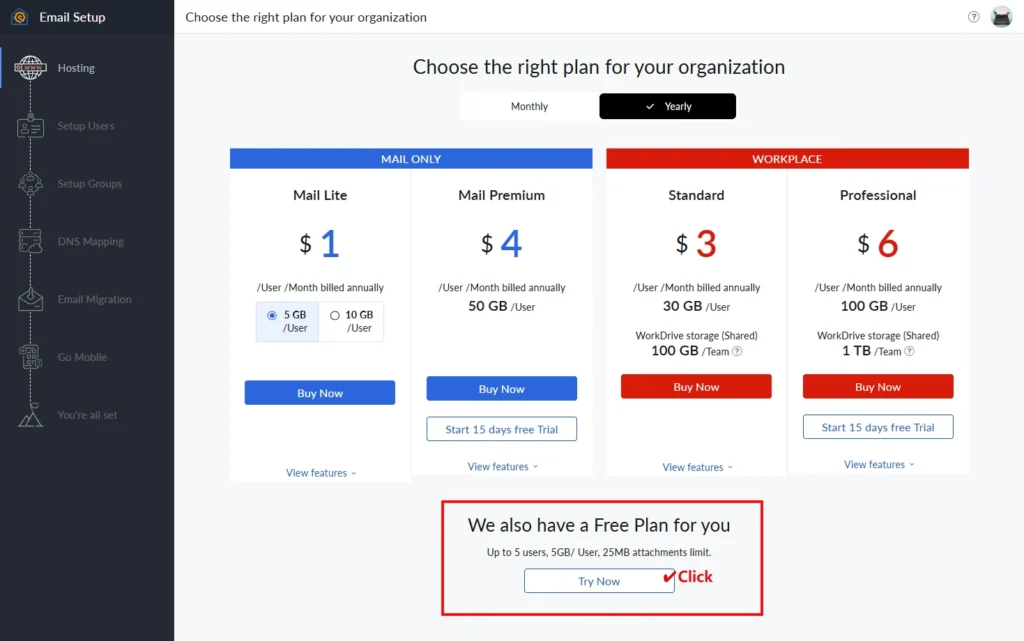
On the next screen, you will see the plan selection options. Zoho Mail offers two main categories of plans: Mail Only and Workplace. Selecting the Workplace plan provides access to additional productivity and collaboration features such as cloud storage, document management, team collaboration tools, chat, and video conferencing. However, if you only need an email service, the Mail Only plan should be sufficient. Be sure to review the pricing differences between monthly and yearly subscriptions.
As we’re just getting started, opting for the free plan first is recommended. I opted for the Free Plan. You will find a Free Plan Try Now button below. Click it to proceed to the next step.
| Plan Type | Monthly Price (USD) | Yearly Price (USD) | Storage/User | WorkDrive Storage (Shared) | Free Trial |
|---|---|---|---|---|---|
| Free Plan | – | – | 5 GB | – | – |
| Mail Lite | – | $1 (5GB) $1.25 (10GB) | 5 GB 10 GB | – | No |
| Mail Premium | – | $4 | 50 GB | – | Yes |
| Workplace Standard | $4 | $3 | 30 GB | 100 GB | No |
| Workplace Professional | $7 | $6 | 100 GB | 1 TB | Yes |
Step 03: Add an Existing Domain
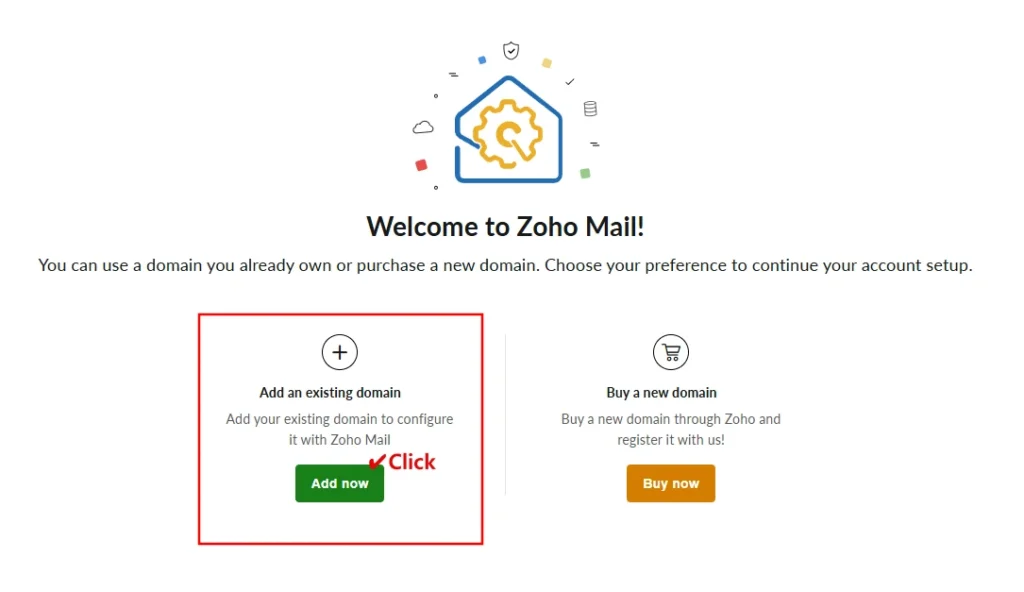
Next, you need to specify the domain to be connected to your account. If you already own a domain, click the Add Now button on the left. If you don’t have a domain yet, you can purchase one separately and return later, or you can buy a domain directly through Zoho by clicking the Buy Now button on the right.
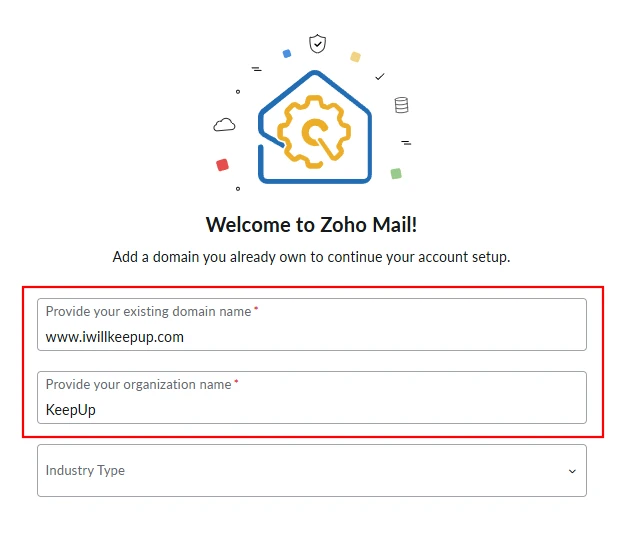
Once the next screen appears, enter your domain name and organization name. If you’re using Zoho Mail for a personal blog like me, you can create an organization name as you see fit. You can always change it later after the initial setup. The third field, Industry Type, is optional. Clicking on this field will display a list of industries to choose from. If your business falls under one of the listed categories, select the appropriate option. Once all details are entered, click the Add Now button below to proceed.
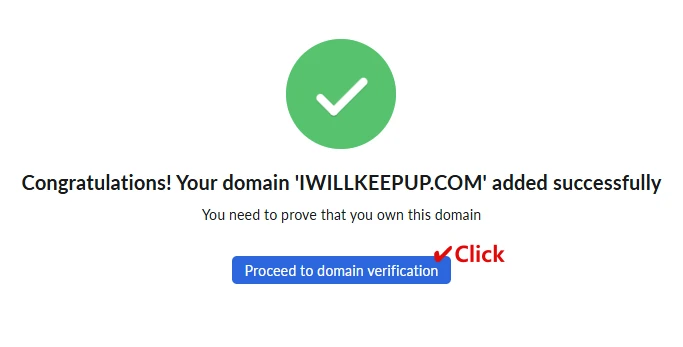
After successfully adding your domain, click the Proceed to Domain Verification button to move forward with the setup process.
Step 04: Domain Verification
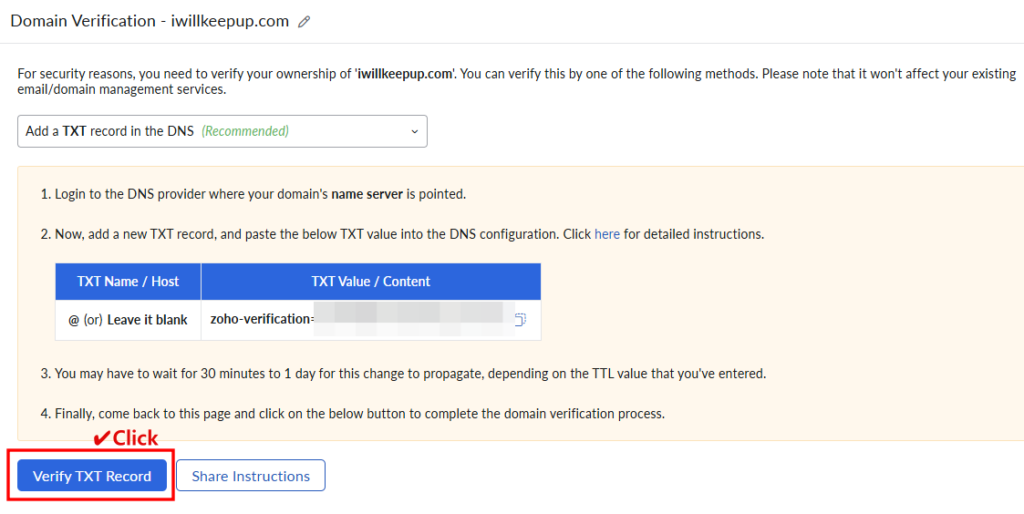
Next, you will encounter a screen that provides guidance on verifying your domain. This process confirms that the domain you added truly belongs to you.
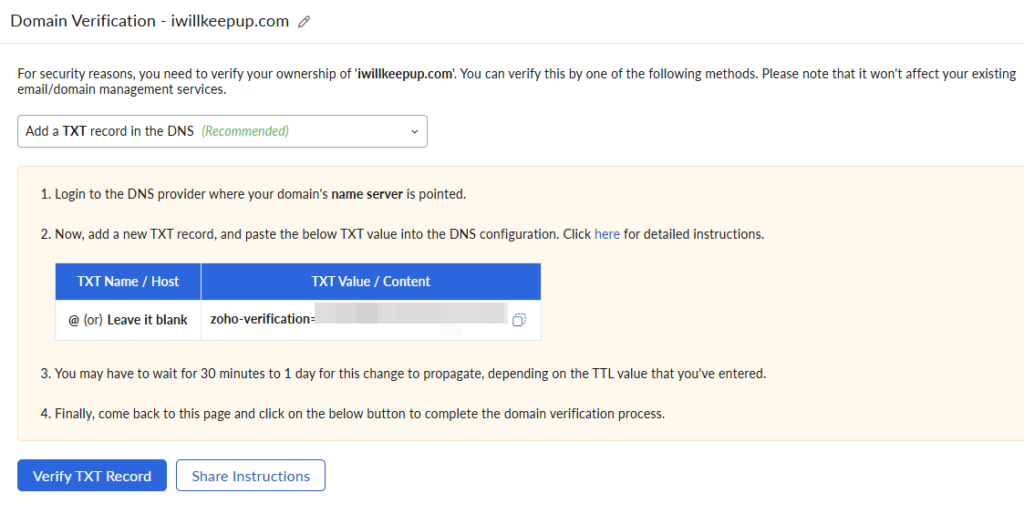
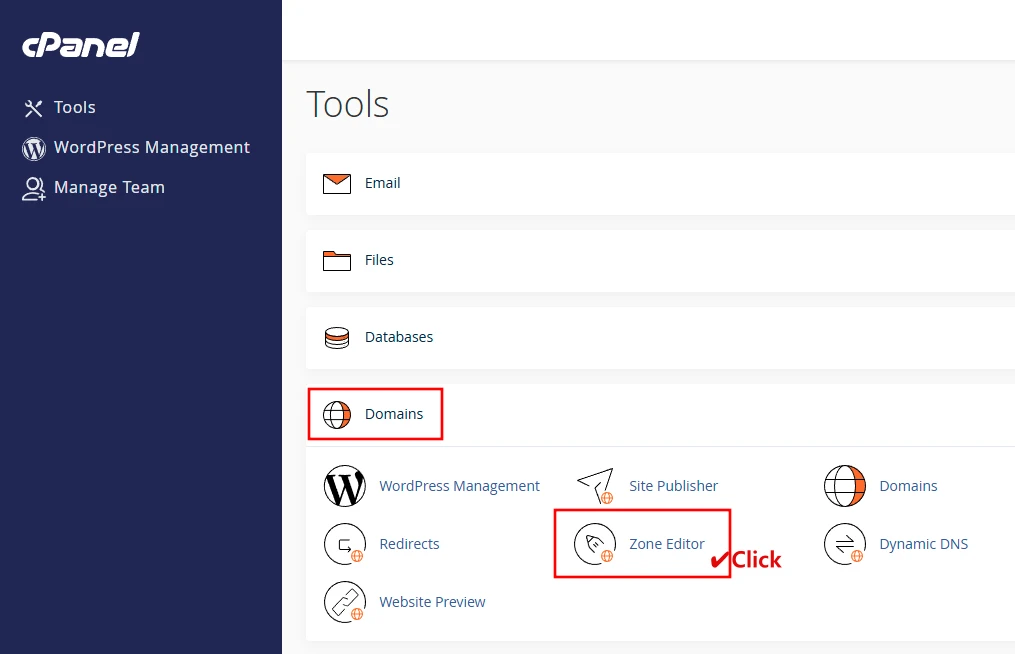
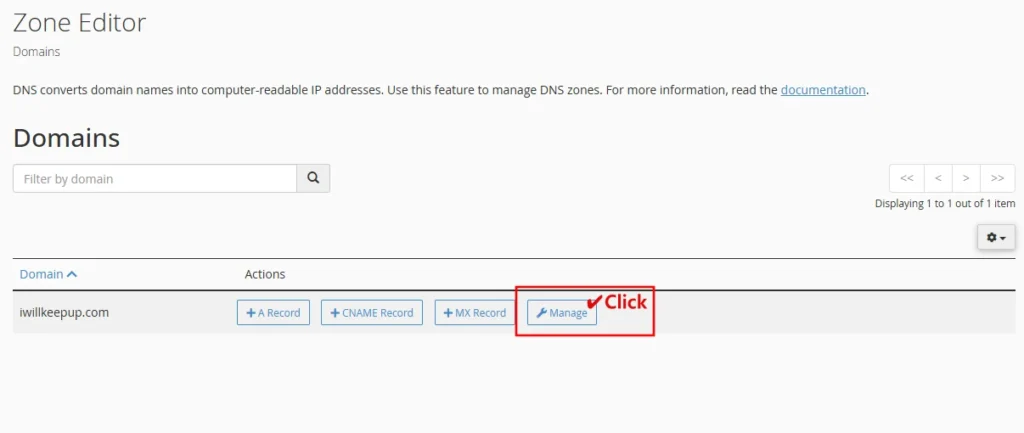
If you are managing your website through a hosting service, the DNS provider mentioned in the instruction step 1 refers to your hosting service provider. Open a new browser tab and log in to your hosting provider’s account. Once logged in, navigate to the cPanel and look for the Zone Editor option under the Domains section. Click on it to proceed with the domain verification steps.
Your hosting service may offer a custom management panel instead of cPanel. In this case, locate the corresponding page for DNS management and follow the same steps to complete the verification process.
Click the Manage button in the Zone Editor.
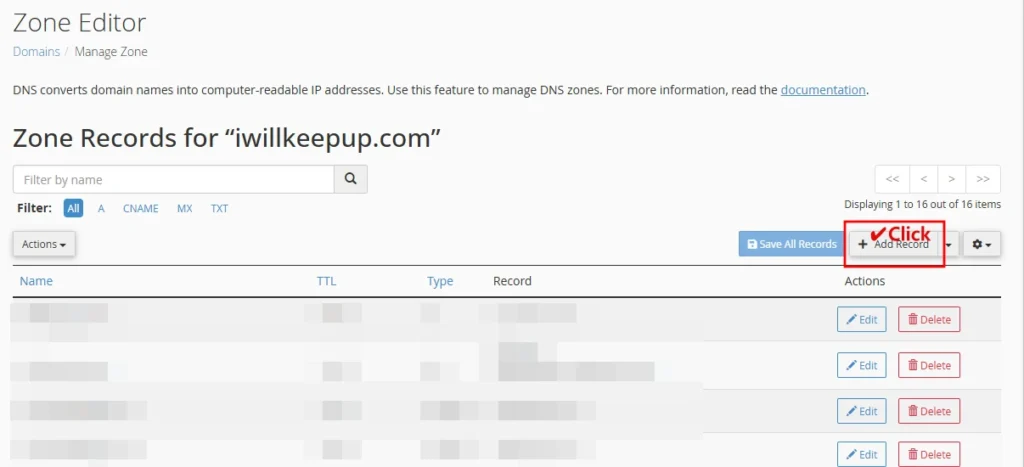
Then, click the Add Record button. A form will appear where you need to enter the values provided in Zoho’s guide.

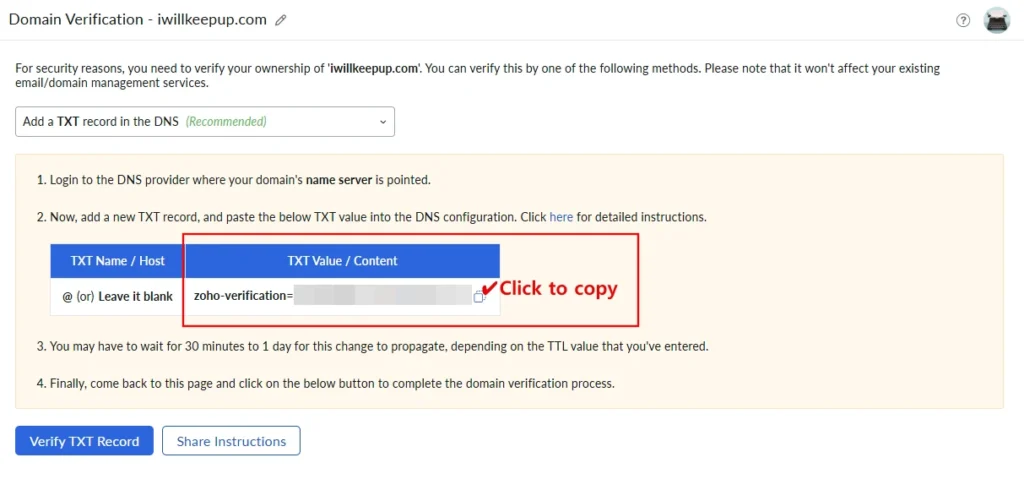
Keep the Zone Editor page open and switch to Zoho’s Domain Verification page to copy the TXT Value. Click the copy button to easily copy the value.
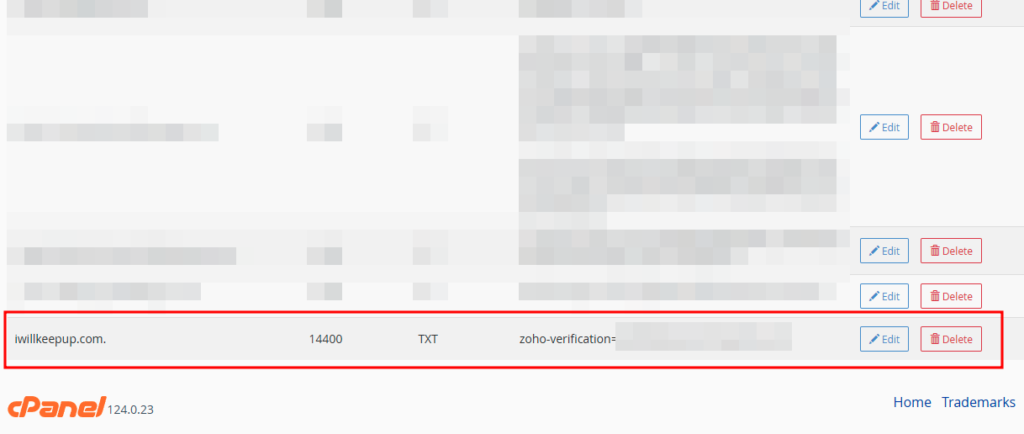
Once you have completed the input, it should look like this. Enter your domain name in the Name field. The TTL value may vary depending on your existing website settings. In my case, all other records had a TTL of 14400, and I was unable to enter any value other than 14400. According to Zoho’s official guide, if you are allowed to modify the TTL value, it is recommended to enter the lowest possible value. Please enter a value that suits your situation.
“If the TTL is editable, set it to the minimum possible value recommended by your Registrar”
Zoho Mail Domain Verification Guide

Click the Save Record button. If the save is successful, you will see a confirmation message in the top right corner.

You can also verify the newly added record in the Zone Editor list. Keep the Zone Editor open as you will need it in the next steps.
Now, return to the Zoho Mail Setup page and click the Verify TXT Record button. If successful, you will proceed to the next screen.
Step 05: Create an Email Address
Create your email address. The account you are creating now is the Super Administrator account. If you are running a personal blog like me, this might not be very significant, but for businesses working in teams, this account can be used to add and manage other user accounts.
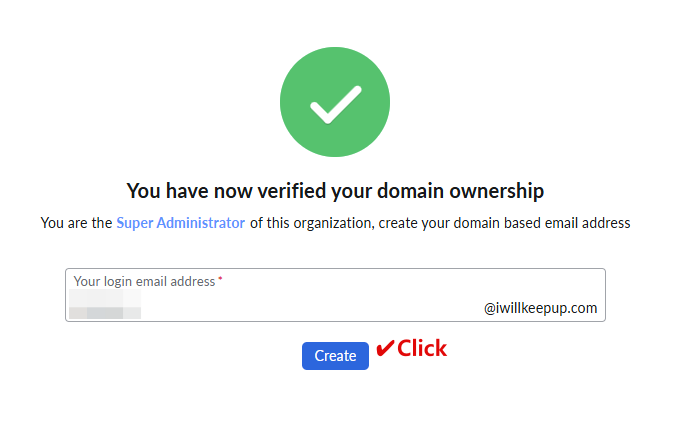
Click the Create button to proceed to the next step, where you will see the Users list. Since you have just created the admin account, only one user will be displayed. Click on the user in the list to edit their details. You can do this now or later after completing the entire setup.
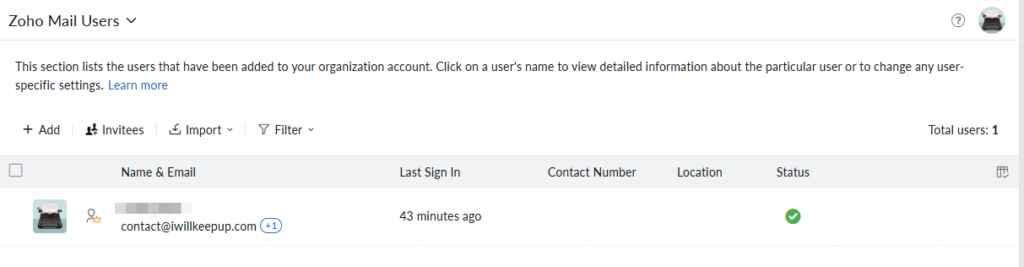
To proceed to the next step, click the Proceed to Setup Groups button at the bottom of the page.

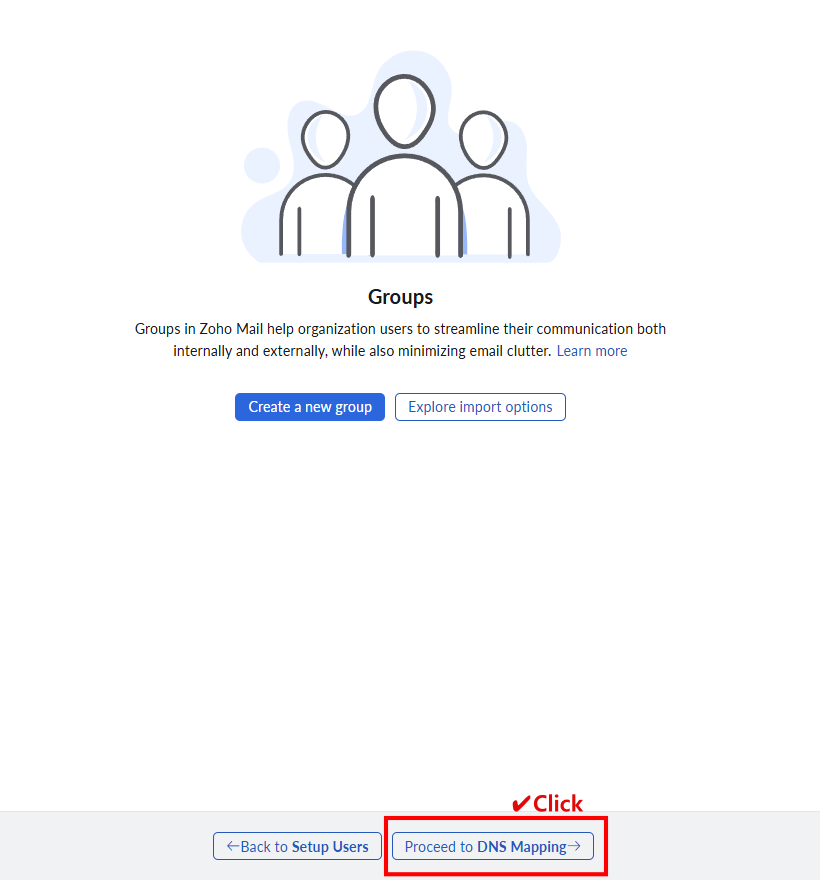
Step 06: Setup Groups
If you are setting up accounts for a team, you may need to configure Groups. However, since this guide is based on setting up a personal blog, we will skip this step. Click the Proceed to DNS Mapping button to continue.
Step 07: DNS Mapping
On the next screen, you will see a guide for DNS Mapping. To complete this step, you need to add three records to your DNS settings:
- MX
- SPF
- DKIM
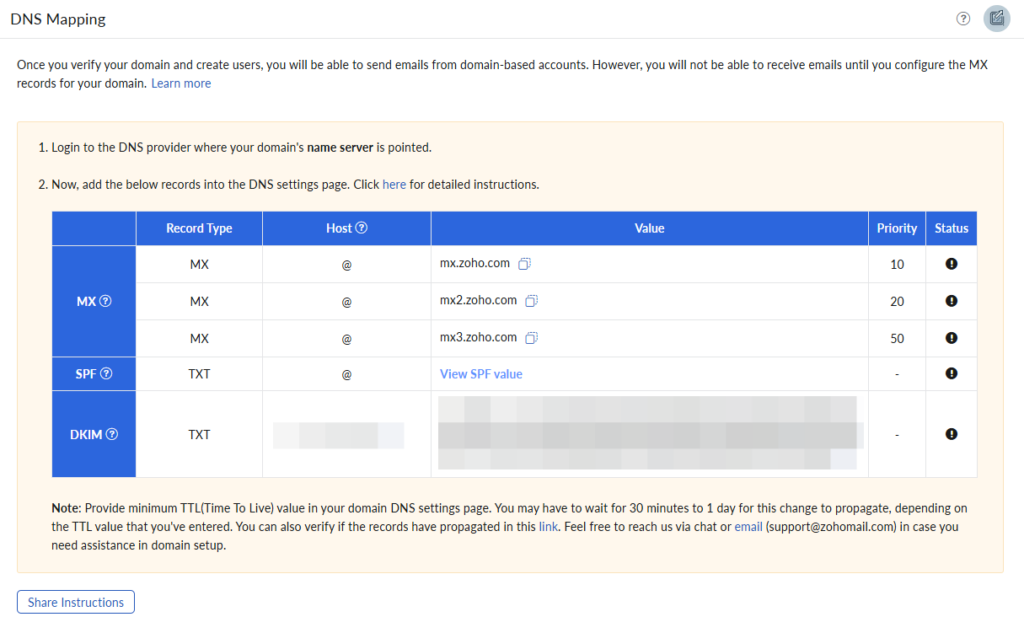
MX
Go back to the Zone Editor of your hosting service. Click Add Record and enter the MX values provided in Zoho’s guide. You need to add three MX records. When entering the first record, it should look like this:

Enter your domain name in the Name field. Set the TTL according to your existing website settings. If you’re unsure, you can match it with other TTL values listed in the Zone Editor. After adding the three MX records, review the list to ensure they have been successfully added.
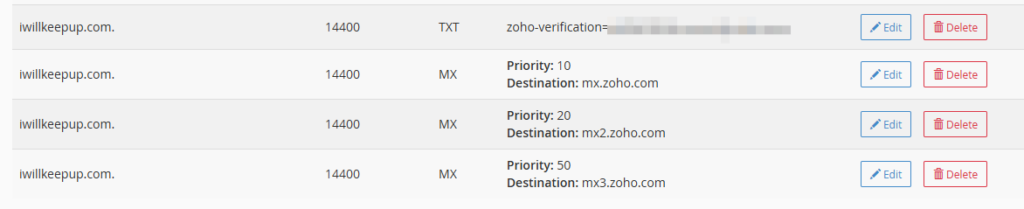
Important: After adding the records, check if there are any existing MX type records with a priority value lower than 10 or set to 0. If you find any records with a priority of 0 or below 10, delete them by clicking the Delete button. When I initially set up my email, I overlooked this step and didn’t remove the record with priority 0. As a result, I couldn’t receive emails correctly, which caused significant confusion while troubleshooting.

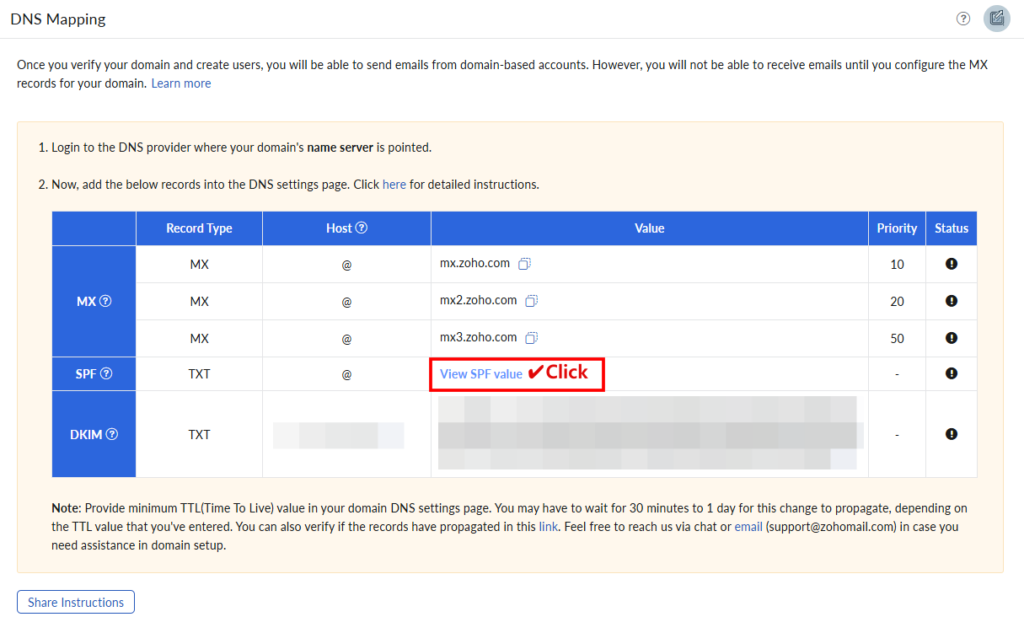
SPF
Now it’s time to add the SPF record. Go back to the Zoho instruction page and click on View SPF value.
A message will appear, giving you two options to copy. Choose the one that best suits your situation. I opted for the merged value listed below.
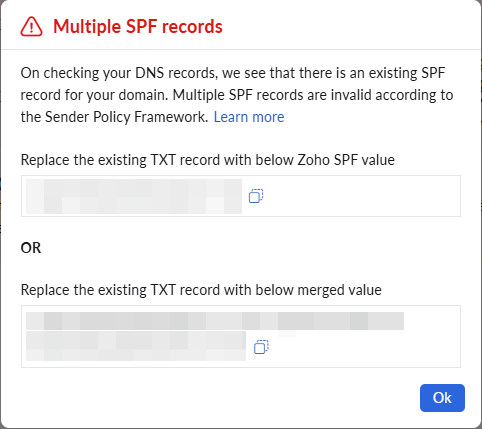
Return to the Zone Editor and check if there is already an SPF-related record in the list. There should only be one SPF record in the list, so instead of adding a new record, click the Edit button next to the existing SPF entry.
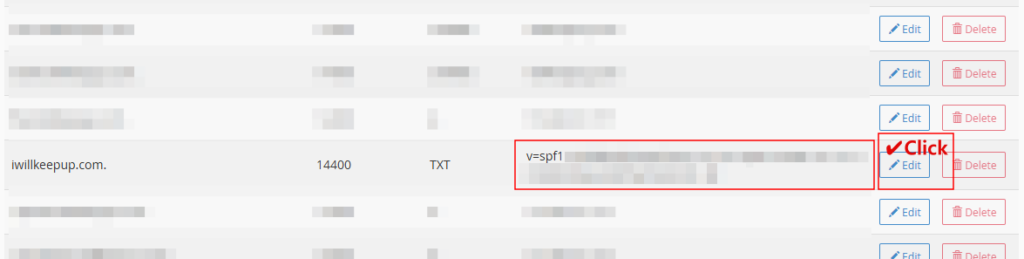
Once editing is enabled, replace the value in the Record field on the far right with the copied value.

DKIM
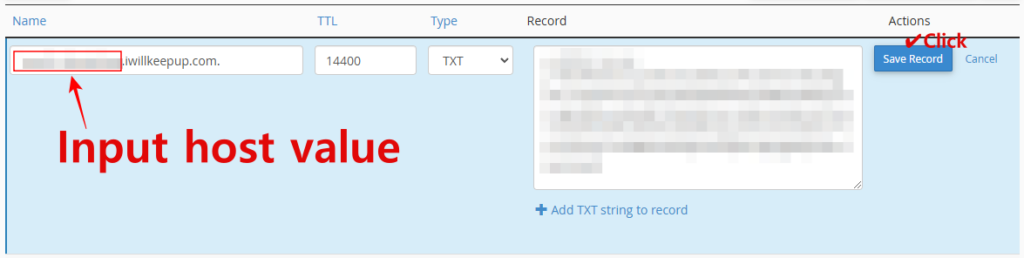
Click Add Record in the Zone Editor to add a DKIM record. In the Name field, enter the Host value from Zoho’s DNS Mapping instruction page, prepending it to your domain. It should be formatted as: HostValue.Domain.TLD.
Step 08: Verify DNS Mapping
Once DNS Mapping is completed, you need to verify whether the mapping has been successfully applied. The DNS settings can take anywhere from a few minutes to several hours to propagate, depending on the TTL values set during the record addition. Therefore, be aware that verifying immediately after mapping may not reflect the correct status.
At the bottom of Zoho’s DNS Mapping page, click the Verify All Records button to initiate verification. Wait for the process to complete, and you will see the colors in the instruction table change. Successfully configured records will be highlighted in green, while those that are not yet functioning correctly will appear in red. As mentioned earlier, the propagation time varies based on TTL values, so even if the records were added correctly, they might still show as red.
Verification of the mapping status can also be done later after completing the setup, so you don’t have to wait for all records to turn green at this stage. You can proceed to the next step without delay.
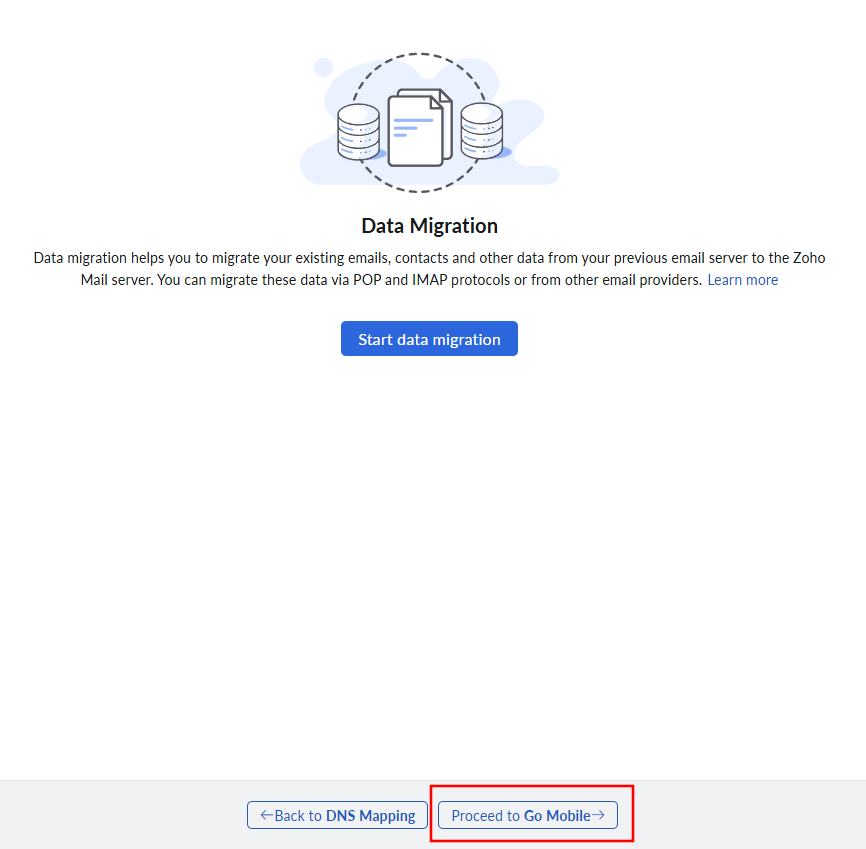
Step 09: Data Migration
In this step, you can migrate data from your previous email account to the newly created Zoho Mail account. Since I did not have an existing business email, I skipped the Data Migration process. In this guide, I will also skip explaining Data Migration. Click the Proceed to Go Mobile button below to continue.
Step 10: Install Mobile Apps
On the Go Mobile page, Zoho introduces its mobile apps. Clicking on the link in the middle of the page will take you to the mobile app introduction page. If you do not intend to use the mobile app, you can click the Proceed to Setup Completion button at the bottom to move to the next page.

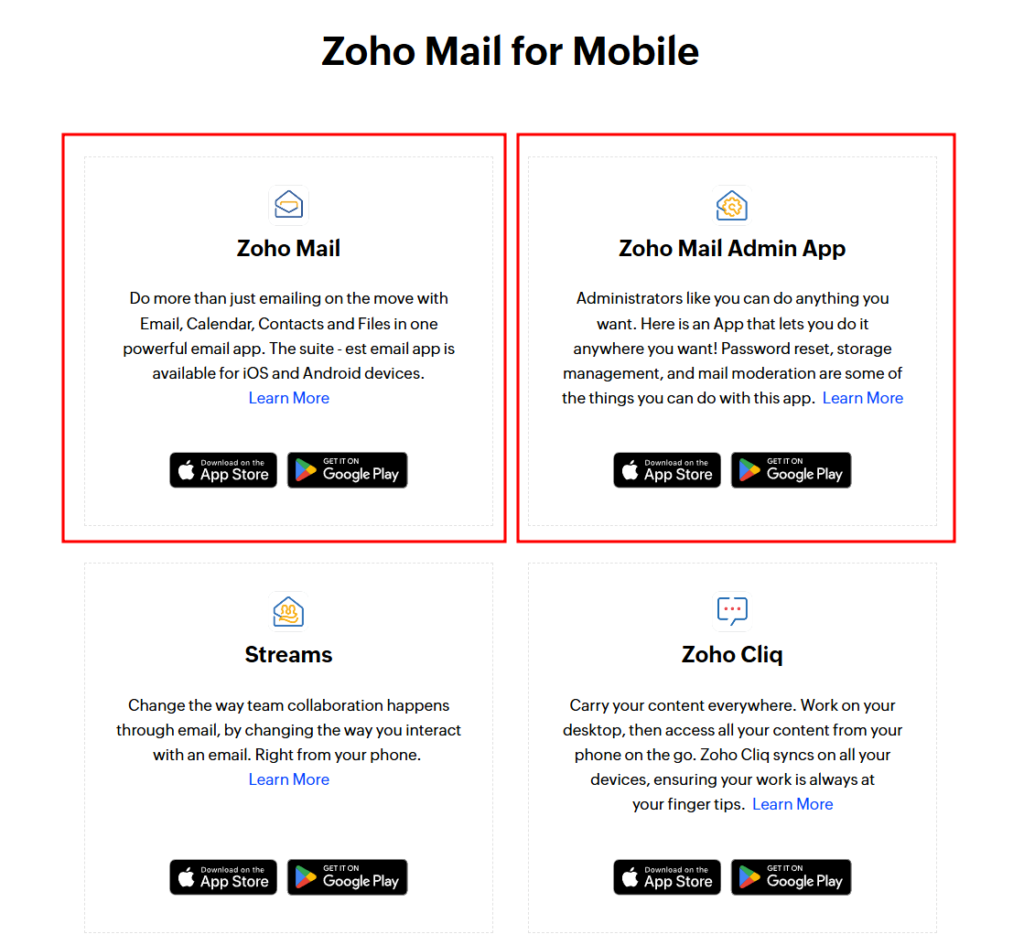
The Zoho Mail free plan does not support IMAP/POP/Active Sync. This means that you cannot add the newly created business email account to your smartphone’s email app. To use your free plan account on a smartphone, you must access it through a web browser or install the Zoho Mail app, which is the more convenient option.
- Zoho Mail
- Zoho Mail Admin App
There are two types of Zoho Mail mobile apps available. The Zoho Mail Admin App includes additional administrative features. Depending on your needs, you can choose either one to install and use.
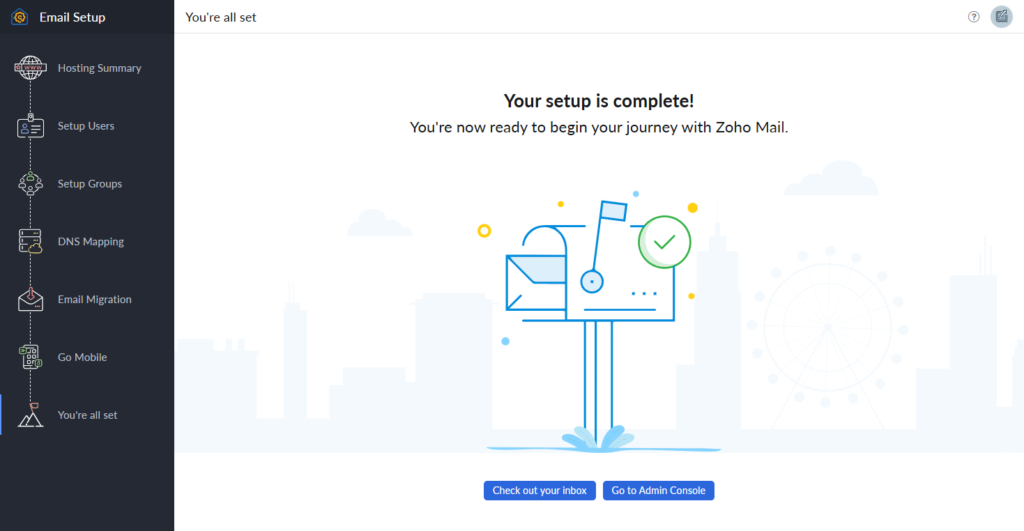
Step 11: Setup is complete! However, it’s not over…
A message will appear indicating that the Zoho Mail setup is complete. Congratulations! However, there are still a few tasks left to finish. Please follow the next steps.
Step 12: Configure Email Routing
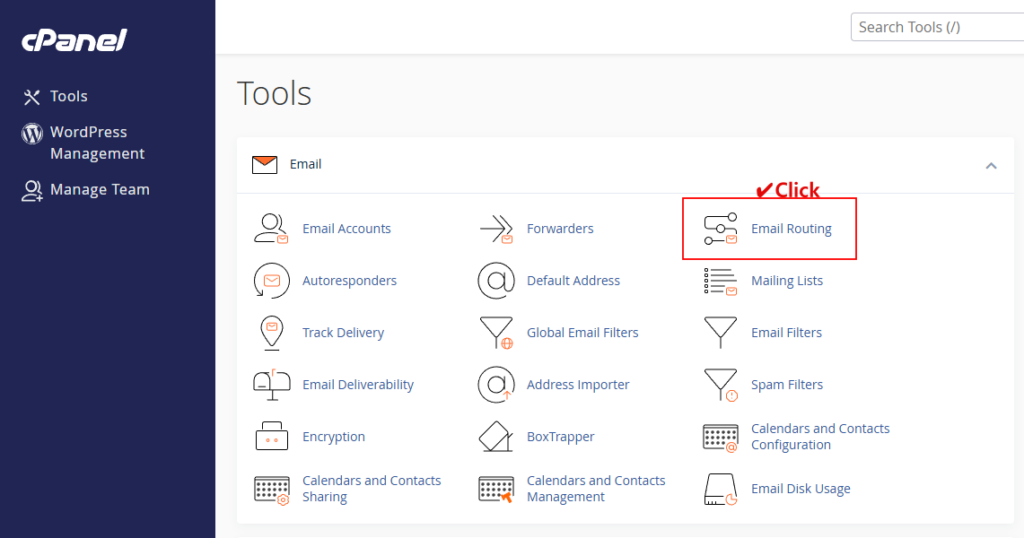
Return to the cPanel of your hosting service. Under the Email menu, you will find an option called Email Routing. Click on it to proceed.
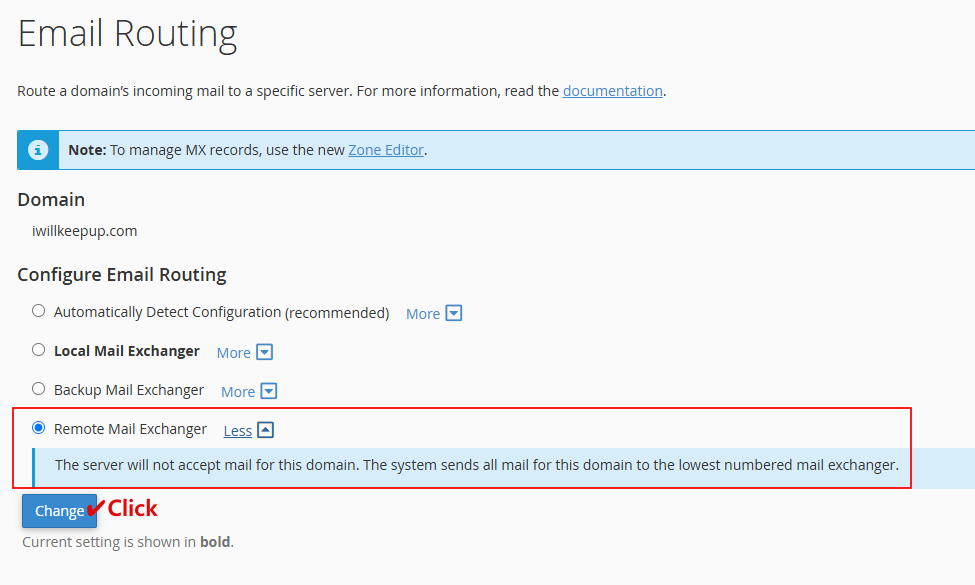
On the Email Routing page, select the Remote Mail Exchanger option and click Change. This setting ensures that emails sent to your domain are received by Zoho Mail’s servers.
Step 13: Final DNS Mapping Check
We proceeded to the next steps without completing DNS Mapping verification in Step 8. To ensure that the newly created email address can receive emails, it is essential to verify the DNS Mapping status.
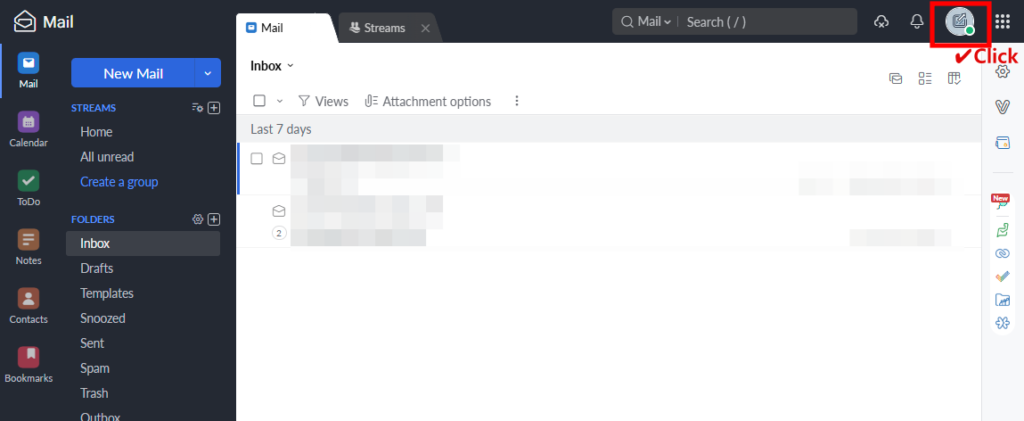
It is recommended to perform this step one day after the initial setup. If the initial setup is complete, logging into Zoho Mail will take you directly to the inbox screen. From the inbox, follow these steps to access the verification menu.
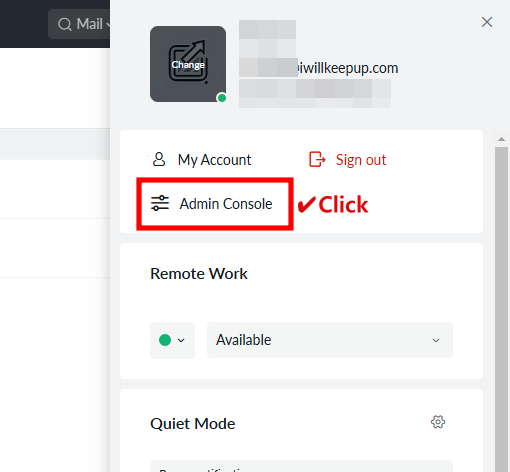
Click on the profile image in the top-right corner, which will open a side menu. From the side menu, select the Admin Console option.
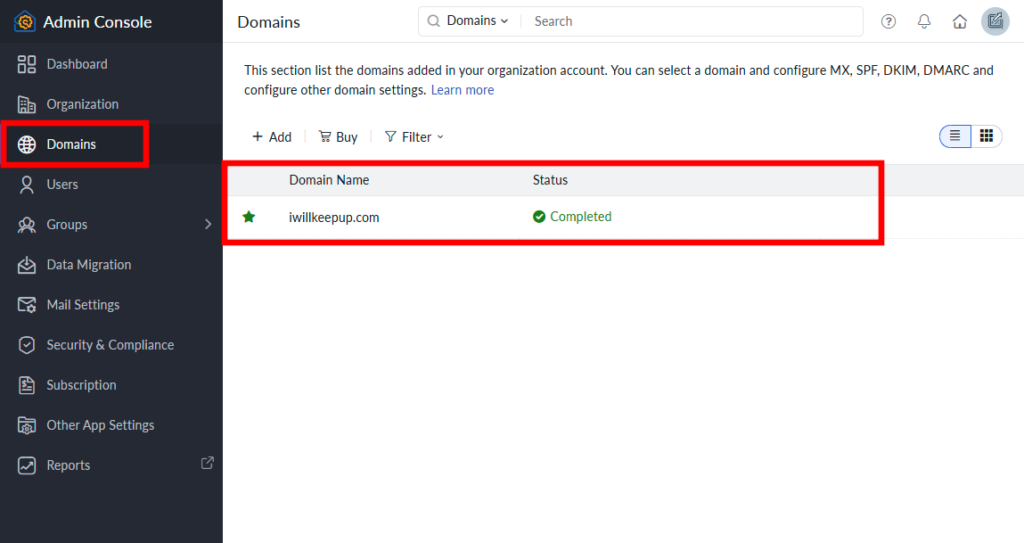
Once you are in the Admin Console, click on the Domains menu. Here, you will see your domain name and its status. In my case, the status displayed as Completed, but depending on your setup, it may show a different status. Click on your domain name to proceed.
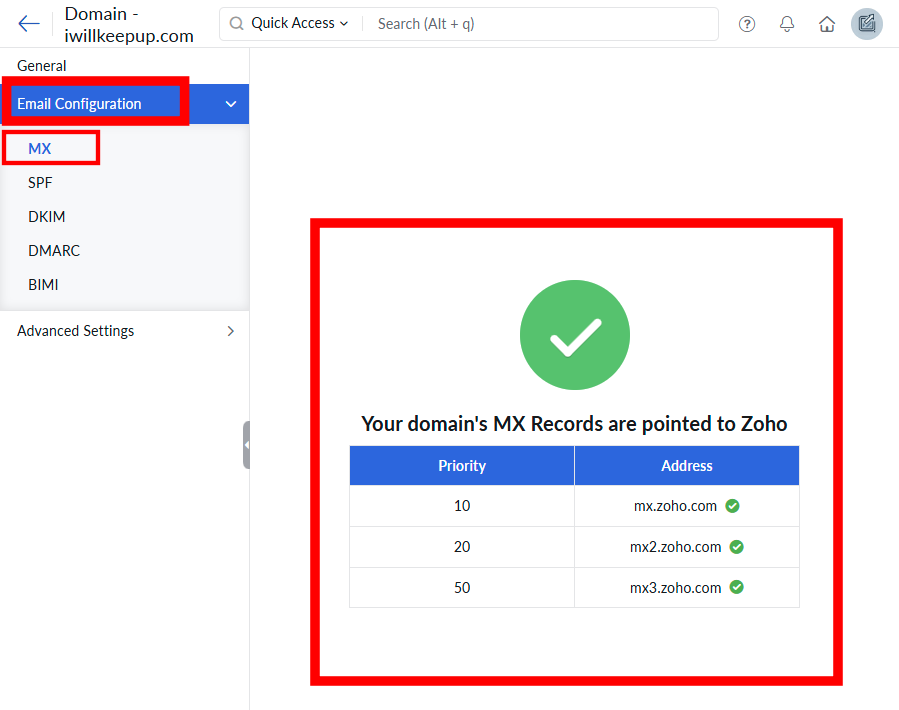
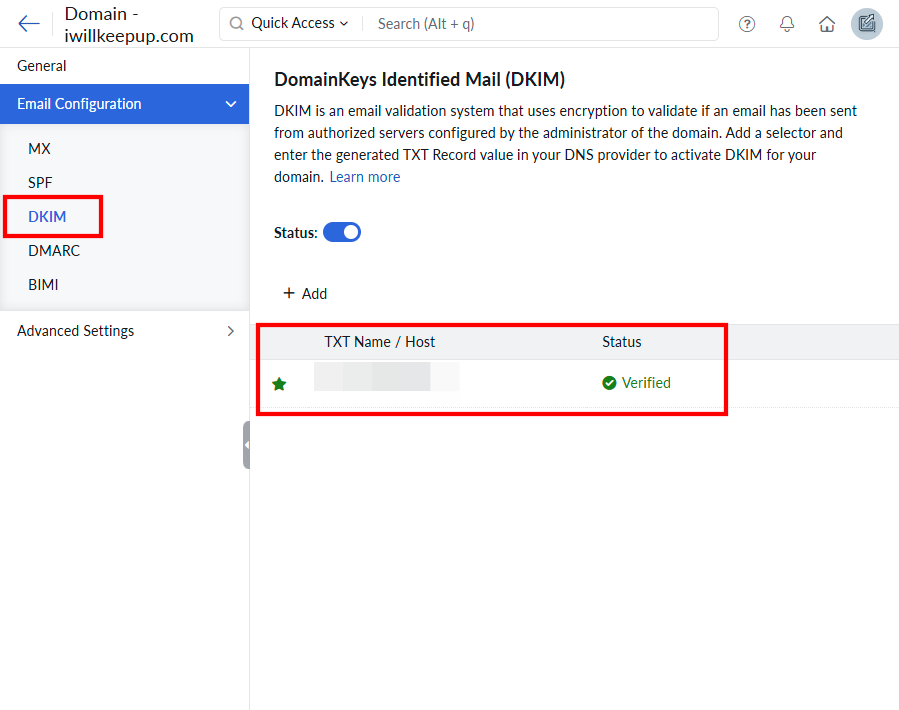
On the next screen, click on Email Configuration, then select the MX tab. If the DNS settings have been applied successfully, you will see check marks displayed.
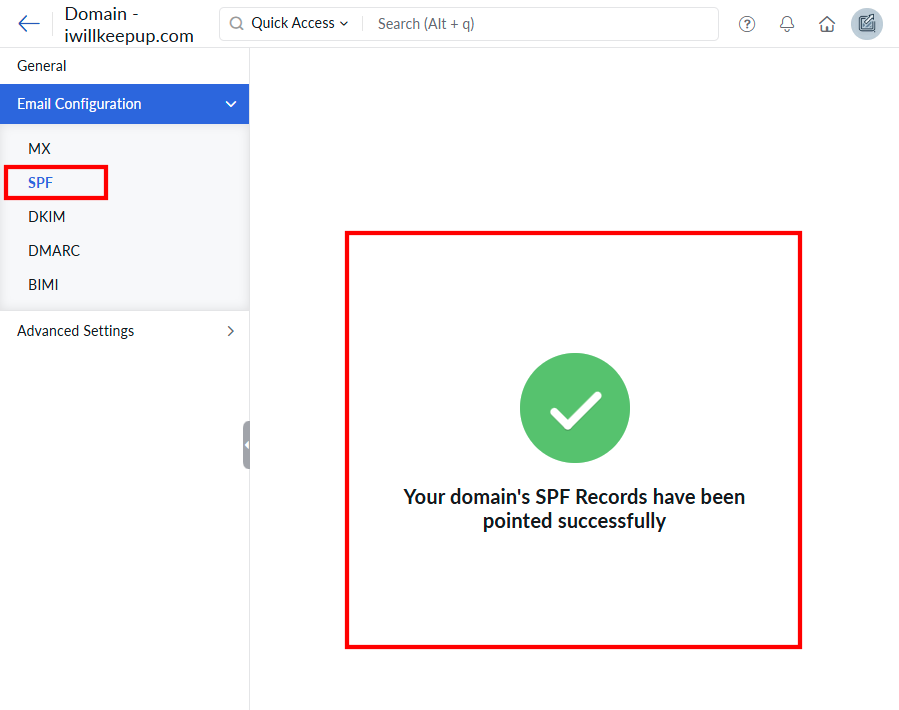
Similarly, check the SPF and DKIM records. If all of them show green check marks, your email setup should be functioning correctly.
3. Ensuring Everything Works: Email Test Check
This is the final step. Send an email to your newly created Zoho business mail account. If you can successfully receive it, the setup is complete.
Setting up your email may have been more challenging than expected, but you’ve successfully completed it! Congratulations on completing the setup!
